Introduction
In today's fast-paced digital world, it's crucial to have a robust and scalable infrastructure for your applications. With the increasing popularity of containerization and orchestration, deploying applications on Kubernetes has become standard practice. In this article, we will explore how to deploy a WordPress application on a Kubernetes cluster and manage its database with Amazon Relational Database Service (RDS) using Terraform.
Prerequisite
An AWS account and access to the AWS Console.
Understanding of Terraform and its usage for infrastructure as code (IAC).
Familiarity with Kubernetes and its components such as Pods, Replication Controllers and Services.
Step 1: Setting up an Amazon RDS instance with Terraform.
Creating a DB instance with MySQL and making it publicly accessible in order to connect it with WordPress. For security concerns, I am adding VPC Security Group with the inbound rule that allows only our local machine to access the RDS instance on port 3306.
To dynamically get the public IP of the current machine I am using a simple website icanhazip.com which retrieves your Public IP.
# rds.tf file
provider "aws" {
    region = "ap-south-1"
}

resource "aws_db_instance" "default" {
    allocated_storage=20
    storage_type="gp2"
    engine               = "mysql"
    engine_version       = "5.7"
    instance_class = "db.t2.micro"
    name = "wp_aws_db"
    username = "abhishek"
    password = var.password
    #identifier = var.id
    skip_final_snapshot = true
    #Allowing Public Access
    publicly_accessible = true
    #Attaching VPC Security Group
    vpc_security_group_ids = [aws_security_group.access_to_localhost.id]
    apply_immediately = true
    tags = {
    Name = "wp_aws_db"
    }
}
#Storing Current Machine's Public IP
data "http" "localhost_public_ip" {
  url = "http://ipv4.icanhazip.com"
}

#Creating Security Group that allow Minikube to connect  RDS
resource "aws_security_group" "access_to_localhost" {
  name        = "access_to_localhost"
  description = "Allow 3306 inbound traffic only for the public ip of the machine running this code"

  ingress {
    description = "3306 from Minikube"
    from_port   = 3306
    to_port     = 3306
    protocol    = "tcp"
    #Public ip of localhost is allowed
    cidr_blocks = ["${chomp(data.http.localhost_public_ip.body)}/32"]
  }

  egress {
    from_port   = 0
    to_port     = 0
    protocol    = "-1"
    cidr_blocks = ["0.0.0.0/0"]
  }

  tags = {
    Name = "access_to_localhost"
  }
}

#Give  DNS Name of RDS Instance on terminal
output "dns" {
value = aws_db_instance.default.address
}
It is good practice to pass your credentials from "terraform.tfvars".In the above file, I have saved database credentials in a variable password.
In the "variables.tf" file I have declared my variable "password".
# variables.tf file
variable "password" {
    description = "password for db"
}
In the "terraform.tfvars" file I have mentioned value of my variable "password".
# terraform.tfvars file
password="wprds123"
Step 2: Create deployment using terraform and expose WordPress services.
Here, I am using minikube for Kubernetes cluster and deploying the WordPress app with two replicas and exposing its service of type "NodePort" on it with help of Terraform.
# k8s.tf
provider "kubernetes" {
    config_path="~/.kube/config"
}
resource "kubernetes_service" "wp_svc" {
  metadata {
    name = "wp-service"
    labels = {
      app = "wordpress"
    }
  }
  spec {
    selector = {
      app = "wordpress"

    }
  port {
    node_port   = 30000
    port        = 80
    target_port = 80
  }
  type = "NodePort"
 }
}

resource "kubernetes_deployment" "wp-dep" {
  metadata {
    name = "wp-dep"
    labels = {
      app = "wordpress"

    }
  }
  spec {
    replicas = 2
    selector {
      match_labels = {
        app = "wordpress"
      }
    }

    template {
      metadata {
        labels = {
          app = "wordpress"
        }
      }
      spec {
        container {
           image = "wordpress"
           name  = "wordpress-pod"

           port {
             container_port = 80
           }
        }
      }
    }
  }
}
Step 3: Deploying with Terraform.
Run the following command to initialize Terraform in your configuration directory:
 # this cmd will initialize your configuration directory and install required plugins.
 terraform init
Run the following command to see the changes Terraform will make:
terraform planIf the plan looks good, run the following command to apply the changes:
terraform apply --auto-approve
Step 4: Accessing our wordpress app.
Command to get url of service that we expose.

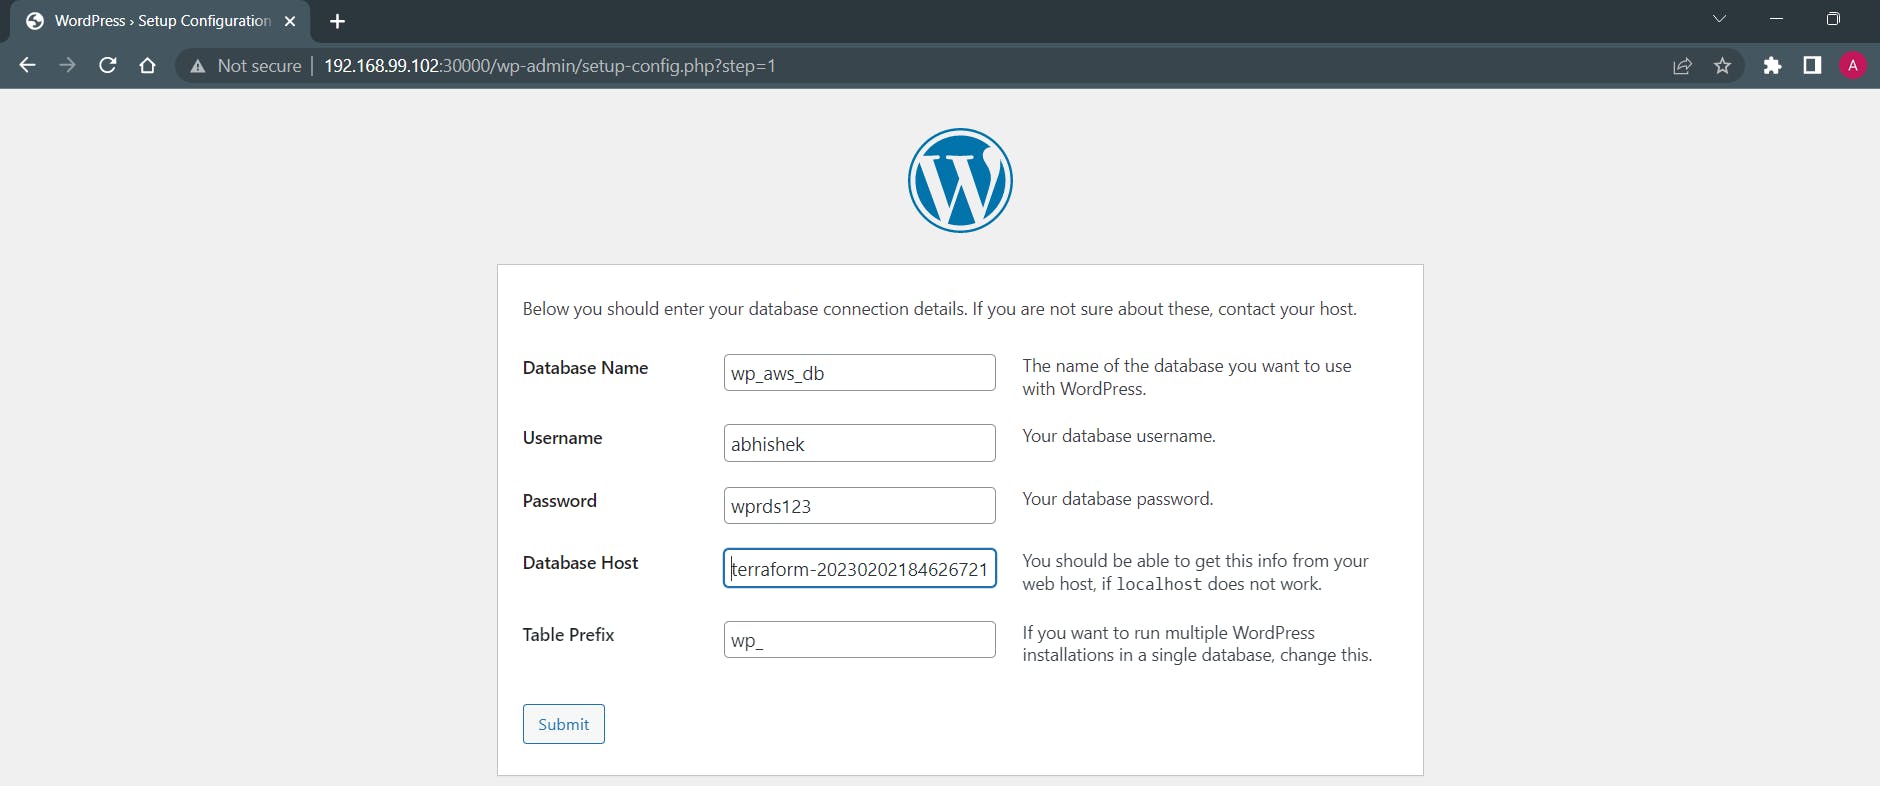
Now Open minikube-nodes-ip:30000 and proceed with installation wizard:

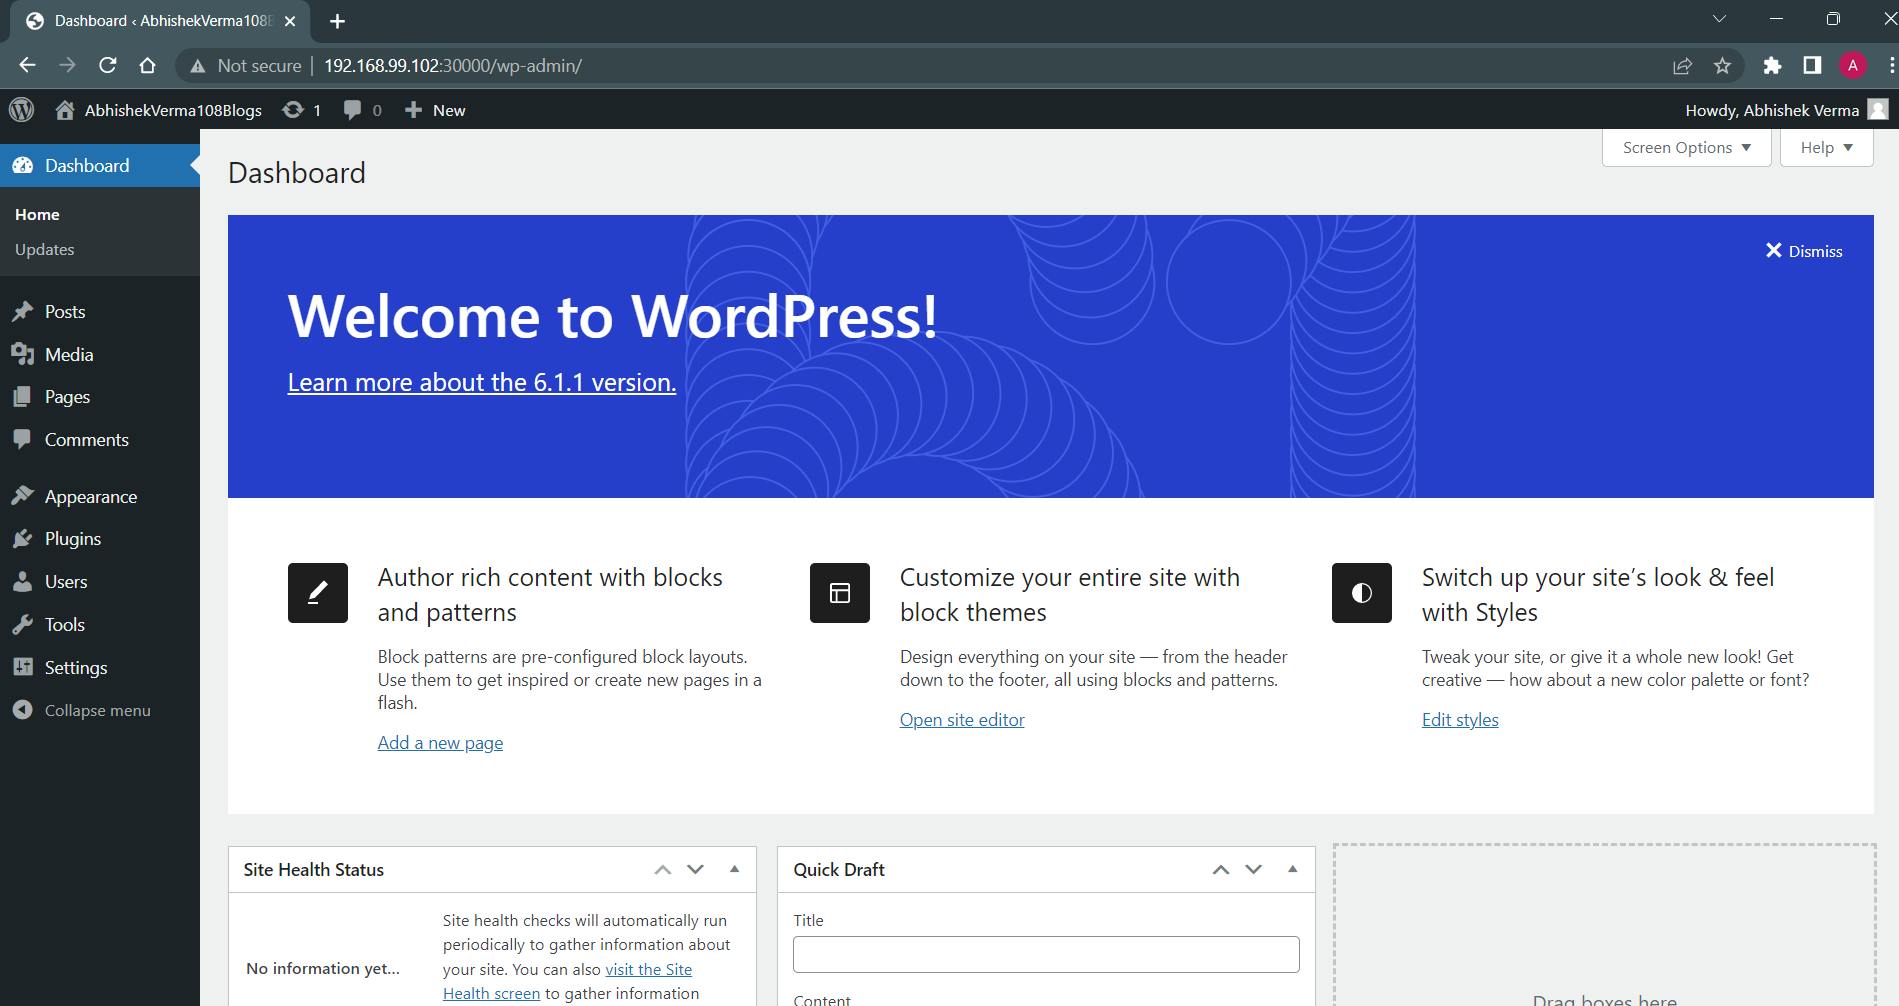
Now after giving some information on WordPress.We can see our wordpress app.

Thank you for taking time to read this. Have a great day!
